

Disclosure of Material Connection: Some of the links in this post may be "affiliate links." This means if you click on the link and purchase an item, I will receive an affiliate commission. Disclosure in accordance with the Federal Trade Commission's 16 CFR, Part 255. This site is a participant in the Amazon Services LLC Associates Program, an affiliate advertising program designed to provide a means for sites to earn advertising fees by advertising and linking to Amazon.
Ever wanted to rejuvenate metal outdoor patio furniture, but weren’t sure how or where to start? You’ve come to the right place!
Metal is—and has been for most of recorded history—one of the hardiest materials to build anything. And it is with durability in mind that we buy our patio furniture in metal, is it not? A few spots of rust or flaking paint should not mean that an entire chair gets thrown out… and it doesn’t have to! In this article, we will cover all there is to know on how to rejuvenate that cherished table in your outdoor space, as well as how to keep it in good condition for a longer time.
Worth noting: this procedure is only for metal furnishings whose rust presence is only superficial; if rust is allowed to sit on the metal long enough, it will render it too weak for you to even use the piece. In this case, the only solution is to toss the whole thing away. In other words—don’t tarry!
The Shopping List
A job well done, requires the right equipment—and with this one, it goes well beyond a paint brush. Here’s a breakdown.
The Paint
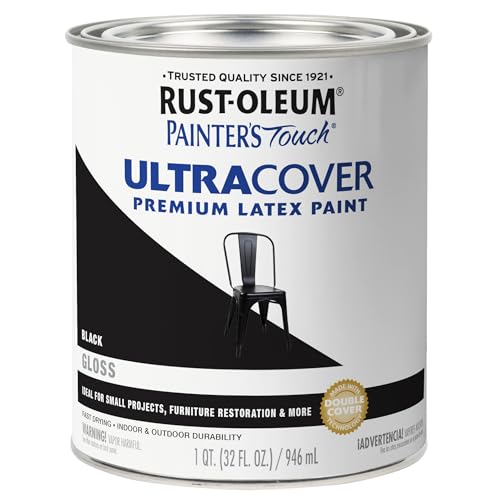
This one is self-evident, but only to a degree—since the pieces we’re working with are intended for being outside, the paint we use has to be the appropriate type, i.e. something specifically formulated to stand up to the elements.
Buy on AmazonThis paint is a good example, and it comes from a brand that is widely trusted for this sort of jobs. That said, spray paint is often recommended for metal, as furnishings tend to come with intricate engravings and reliefs that might be too difficult to reach with a paint brush. Spray paint is generally easier to handle, coats and dries faster, and wouldn’t require a brush—and, depending on your choice, no primer either (more on that below).
The Primer

Silly though it might seem to the first timer, this is a step that should not be skipped in this sort of paint job—and in several others, really, but we won’t digress in that direction. The main purpose of priming is to provide a better surface for the paint to latch onto, making for a more efficient, longer lasting paint job.
Buy on AmazonThose that are formulated for metal come with the added benefit of boosting the material’s durability, by helping preserve it from corrosion. Primers (such as this one) usually come in white and other neutral colors. Also available in spray version.
The Tools
The following list covers every part of the job, from preparation to finish. The procedure itself will be covered further down.
Buy on Amazon- Drop cloths, to protect your work area and its surroundings.
- Cinder or wood blocks; any old blocks you have lying around will do. These will be necessary for raising the furnishing you’re working on.
- Wire brush, to remove rust and old paint; and a putty knife, for the same purpose. Some brushes, like this one, come with multiple ends, allowing you to do more with a single item: use the bigger bristles all over for the main pass, reach into narrower corners with the bristles at the tip, and use the flat end of the handle for scraping.
- Sandpaper, 100 to 120 grit, for the same reason. A package like this one can be a good option if you’d like to acquire several grit options (for other future jobs) in one go.
- Detergent, for the cleaning phase of the job; if you find yourself dealing with tougher grime, a degreaser could be what you need. Should you need it, there’s even a sort of cleaner specially formulated for outdoor-type smears, such as tree sap, bird droppings, and mildew.
- Scrub brush, and a bucket, also for the cleaning phase. A few old towels wouldn’t hurt, for drying.
- A paint brush. Even if you don’t go for conventional paint and primer, is also useful for handling runoffs when using a spray can.
- A spray can handle, if you’re spraying. Highly recommended to reduce potential fatigue, especially if the piece you’ll be painting is particularly large.
The Gear
Any painting job you undertake around your home will involve chemicals you don’t want on your skin, clothes or in your airways.
No products found.Thus, protection is key:
- Breathing mask, to keep harmful fumes at bay.
- Gloves of appropriate strength. Disposable ones are a common favorite.
- Old clothing you don’t mind getting smeared; if you have nothing of the sort, you can always go for a disposable full-body suit. Your feet can be covered too.
When talking about metal decay, the first—and perhaps only—thing that comes to mind is rust. If left unchecked for long enough, it can turn an otherwise solid, reliable item into scrapyard fodder. The good news: there are a few ways to effectively suppress the rust, and prevent it from reappearing.
Rust Remover
A few spritzes of this or a similar product, and the rust will come right off. This is considered a good alternative to the more labor-intensive scrubbing, although you can always go for both: use wire brush and sandpaper to scrub off the more outstanding bits, and tackle the smaller, harder to reach areas with the remover.
Alternatively, you can opt for a rust converter. Sounds far fetched, but it’s true—this sort of chemical product acts upon any rust present, turning it from a source of deterioration into a protective layer that keeps moisture out. If you want to save yourself some extra work, you can always go for a primer/converter combination, such as this one; that way, you get both beneficial effects (rust conversion and paint adherence) with a single pass.
Rust Inhibitor

This is a solar powered device that can effectively protect a space from small animals such as birds, raccoons and mice, including bugs.
Buy on AmazonThis sort of product can (and probably should) be applied once your restoration job is all done. As the name implies, it creates a protective layer that prevents rust from forming in the first place, which makes it a good additional step when performing regular maintenance on metal items that are outdoors, and which are not yet due for rejuvenating.
The Procedure
We got our pigments, tools and gear. Time to get into the restoration job itself.
1. Preparation
To begin, you will need to set aside an appropriate time slot. Once you get into removing the rust, you have to follow through all the way to inhibit or convert; otherwise, you risk the rust reappearing in as little as a few hours—which will force you to start from scratch.
Your next step should be to set up your work area, somewhere decently secluded (but not airtight—ventilation is important!), such as an empty garage. If you can’t manage that, at least try to pick a place in the shade and without wind; otherwise the paint will dry off too quickly, and won’t last as long. Once you’ve selected your location, cover the area where you’ll be working (and any surrounding items you see fit) with drop cloths, and have your blocks (cinder or wood) close by so you can raise your piece; this will allow you to reach the legs’ bottoms without having to tip the whole thing over.
Optionally, you can set aside an additional work area for hosing down the furnishing so as to rinse it. If you do, make sure it is someplace where no drops will land where they shouldn’t—on your flowerbeds, for example.
Last but not least: gear up. The mask can wait; we won’t be working with chemicals just yet.
2. Cleanup
This is done in two phases, the first one being to deal with the old paint and any rust present. Begin with your wire brush, putty knife, or multi tool, as necessary. Be ready to apply a good deal of force so that those chips and flakes will come off; special attention should be paid around any bolts and divots present. Once you’ve given it a good pass, a second go with the sandpaper will bring out smaller fragments and yield you a smooth surface. As mentioned before, a rust remover can help ensure that every bit is out before moving on to the next step. Pay attention to the manufacturer’s instructions, as some removers require hosing down afterwards; this is where your secondary work area would come into play.
The second phase is the cleaning proper. In most cases, a regular soapy solution will do; the degreaser and other special cleaners might be the way to go for tougher jobs. Use your scrub brush as needed, and don’t forget to rinse. This can be done with a rag, or by hosing it down (another good time to use your secondary work area)
After rinsing, it’s time to dry. While letting it rest overnight is generally considered okay, we feel it better to be more proactive by patting the furnishing down with a rag or old towel, so that no moisture will be sitting there—as this can easily lead to more rust. Patting it down might not get every drop of water out, and in this case it’s okay to give it a short while; what matters is that the furnishing be completely dry before you continue.
At this point (as in, when the piece is bone dry), you can apply the rust converter. This step could be considered optional, but we feel it is beneficial in that it gives you the absolute certainty that not a particle of rust was neglected: whatever was not scraped off or cleaned, gets instead converted. As always, read the instructions, and wait until everything is dry.
3. Paint Job
This step covers both the primer, which goes first, and the paint that goes on top. By now, your drop cloth should be draped on your cinder or wood blocks, and the furnishing on top; aside from giving you easier access to the piece’s feet, this arrangement also helps ensure no primer or paint will bleed through the cloth onto the floor. Before we begin, a few notes on application:
- Spray can. Remember that a good shake is important before you begin. Give it a full minute, making sure to hear the mixing ball rattle while you shake. As you go, continue shaking at intervals to keep whatever you’re applying (be it the primer or the paint) well mixed. Hold the can upright, 10 to 16 inches away from the piece, and move it back and forth, steady and not too fast, slightly overlapping your previous pass as you move back. Stop and spread back any runoffs with your paint brush as soon as you spot them.
- Paint brush. For best results, it is recommended to apply your coating in very thin coats, letting one dry before applying the other. You might need a smaller brush for reaching into narrower, more intricate spots.
As mentioned before, the primer goes first. The manufacturer will tell you how many coats you need, and how long to wait so it will dry off. When that is done, proceed with your preferred paint, once again referring to the manufacturer’s instructions. Wait 24 to 48 hours for the paint to dry.
At this point, you’re done… but there’s one last thing you might want to do before returning your furnishing to duty.
4. Further Protection
This is where we feel the need to reiterate the convenience of applying a rust inhibitor once the paint job is completed and fully dry: as tough as the paint may be, it doesn’t hurt to provide an additional layer against rust, and it might just allow you to wait longer before you restore the piece again.
Closing Thoughts
Now you know: as long as it’s structurally sound, there’s no need to bid that cherished table or chair goodbye. All it takes is the right equipment and an afternoon’s work, and just about any metal furnishing you have lying around will be left looking like new.
Before we part from you, we might as well touch upon the benefits of a good outdoor cover: aside from preserving your furniture from the elements, it will keep dirt and grime at bay, which could mean less frequent cleaning; they come in different sizes and shapes, so it’s not too hard to find one that fits your particular piece. Happy summer!


