
Disclosure of Material Connection: Some of the links in this post may be "affiliate links." This means if you click on the link and purchase an item, I will receive an affiliate commission. Disclosure in accordance with the Federal Trade Commission's 16 CFR, Part 255. This site is a participant in the Amazon Services LLC Associates Program, an affiliate advertising program designed to provide a means for sites to earn advertising fees by advertising and linking to Amazon.
Disclosure of Material Connection: Some of the links in the post above are "affiliate links." This means if you click on the link and purchase the item, I will receive an affiliate commission. Regardless, I only recommend products or services I use personally and believe will add value to my readers. I am disclosing this in accordance with the Federal Trade Commission's 16 CFR, Part 255: "Guides Concerning the Use of Endorsements and Testimonials in Advertising."
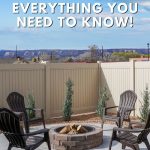
If you’ve heard the term ‘fire pit’, then you might be aware of how useful they are for starting cozy fires in your backyard. There is more to them, though; much more. In this article, we will cover the general concept of fire pits, and a few relevant facts about them. Find useful backyard fire pit facts below!
- Backyard Fire Pit Facts: What, Exactly, Is a Fire Pit?
- Can I Burn Wood in a Gas Fire Pit?
- Can a Fire Pit Damage a Concrete Patio?
- What Is the Best Base for a Fire Pit?
- How Far Should a Fire Pit Be From the Deck?
- Can You Use a Fire Pit in a Gazebo?
- What Else Can I Do To Better Enjoy My Fire Pit?
- Does a Fire Pit Need Air Holes?
- Can You Cook Marshmallows Over a Gas Fire Pit?
- Can You Cook Hot Dogs Over a Gas Fire Pit?
- Can You Use Your Fire Pit Like a Grill?
- Know Your Backyard Fire Pit Facts
Backyard Fire Pit Facts: What, Exactly, Is a Fire Pit?
Its purpose is to provide an enclosure in which to start and maintain a fire without risk of it traveling where it is not supposed to. From there, the configuration may vary:
- Ground level: these can be a simple hole in the ground, surrounded by stones, or a round structure that rises a few feet above ground and which provides the enclosure for your fire.
- Individual piece: An assembly all its own, which can be moved (with varying difficulty depending on size). Most of them are made in metal—cast iron, copper, steel—, with some featuring a faux stone exterior.
Back in the day, you could only expect to run a fire on wood; at present, the fire pit market offers additional alternatives fueled by gas—propane or natural—, or even a special alcohol-based gel. Of the three fuel options, the gel ones tend to be the smallest, hardly larger than a pitcher in some cases. Propane fire pits are remarkably versatile, as some models will be of the right size to carry around while still providing a good amount of heat; whereas others can even function as tables. Wood fire pits, while not so varied in size, do come in different configurations, making it easier to find something suitable for your taste and needs.
Can I Burn Wood in a Gas Fire Pit?
Sounds like a no-brainer, right? And so convenient—get yourself a traditional wood fire when you please, and go back to gas when there’s no wood. Sadly, the answer is a resounding no!, and for very good reasons:
Too Much Heat
You may have heard of British Thermal Units, or BTUs. One BTU is equal to the energy required to raise the temperature of 1 pound of water by 1°F. Heat output for propane and natural gas hovers about the 100,000 BTUs; this is what a compatible fire pit will be built to handle. Firewood heat output, for its part, will vary by species (oak, birch, maple), but it will always be over 10 million BTUs per cord (128 cubic feet); it’s easy to see how this surpasses the capacity of a gas or propane fire pit, by a few orders of magnitude.
In summary: you burn wood on your gas fire pit, you risk eventually tearing it apart—and we all know what happens when something that works with gas develops a tear or two.
Wood Ash and Gas Burners Don’t Mix
Most of us know just how tiny the holes that let the gas out for combustion are. If they get clogged (which something like ash can easily do), it may render the fire pit entirely unusable, or turn it into a safety hazard.
One Fire, Two Hazards
The first thing most of us learn as we grow up is, fire is not to be taken lightly. One of the most elemental safety rules when your fire pit is going, is to never take your eyes off it in case anything happens. Mixing the two fuels piles two sorts of risks in the same place. Not only will you have to watch the fire so it won’t grow out of control; you will also be forced to constantly check for gas leaks, aside from clogged burners, overheated parts… you get the idea.
A Cautionary Note
Certain sources on the internet mention one model of hybrid gas/wood fire pit, but we have been unable to appropriately verify its existence. Given the risks involved, our advice is to take these sources with a pound (rather than a grain) of salt.
Can a Fire Pit Damage a Concrete Patio?
Yes, it can; given enough time, it’s all but certain that it will. It doesn’t matter if the fire pit is sitting right on the floor or on a stand: a regular fire can go as hot as 2000°F, which is easily irradiated by the metal many fire pits are made of. How concrete is affected is almost entirely related to its composition.
Dehydration
It may sound silly, but it’s true: after being set in place, concrete goes through a hydration process, which gives it more and more strength. The process can continue indefinitely (for decades and even longer), provided there is moisture available around the clock. The heat from your fire pit will rob the floor of its moisture, creating air pockets that can eventually turn into cracks.
Effects on the Aggregate
To achieve the strength, workability and texture of concrete, cement alone is not enough: 70 to 80% of it is an aggregate, consisting of a crushed mineral of varying type. Heat will have different impacts depending on the specific aggregate: quartz will expand (and it doesn’t take a lot of heat for this to happen), eventually cracking the concrete. Limestone, on the other hand, will break dawn, causing degradation; this reaction does require higher temperatures, and it is not as devastating. That said, the chemical reactions will result in a calcified surface, which is not pretty to look at and will be a pain to remove.
What Is the Best Base for a Fire Pit?
So you can’t sit your fire pit on concrete; given the heat we’ve spoken about, you probably hesitate to place it on hardwood—and for good reason. Grass will wither after being exposed to such heat long enough. What does that leave us with?
A common choice as a base for a fire pit is stone pavers: they won’t be so affected by the heat coming off the fire pit, and they will keep your ground or floor safe. One thing you can use for placing your fire pit pretty much anywhere you want, is a fire pit mat. This will not only serve to catch stray burning chunks that may fall off the fire pit (or grease, when used under a BBQ grill), it will also reflect the heat back to the fire pit, meaning it won’t affect what is below. Fire pit mats come in different sizes and shapes, so it is not difficult to find something to fit your space. Two things to remember when using these mats:
- Place it with the right side up. Some mats come with an aluminized side for better reflection of heat.
- Don’t sit the fire pit directly on the mat. Use a stand, so there will be a bit of distance between the mat’s surface and the fire pit’s bottom.
What if I Want To Build My Own?
DIY fire pits will be the more classic type: an enclosure (either at ground level or slightly below) surrounded by stone or concrete, and whose bottom may vary. Evidently, you don’t need a fire pit mat in this case; that said, it is still important to plan what will be at the bottom of the pit. Average rocks, for example, are not advised, as they often hold a certain amount of moisture inside and will explode when overheated. So, what is better?
- Soil. In other words, dig your hole and place your wood on top. Cheap and easy. The main drawback: your ashes might easily mix with the soil below, which coulld be particularly hard to clean if the resulting muck catches moisture.
- Sand. Preferably of the fireproof type, as it is made specifically to work as a shield between your fire and the bottom of your enclosure. The problem is, when you scoop out the ash you will likely bring out the sand as well, and you’ll have to add another layer every time after cleaning.
- Fire pit glass. While mostly intended for use in propane fire pits, it works just as well with those that burn wood. A bit expensive, but it is one of the best options if you’d like your fire to be more pleasing to the eye. Available in different colors and textures.
- Lava rocks. Another common choice for use with propane fire pits, this type of rock is optimal due to it originating from magma; if it can endure that sort of extreme heat, then it will be unaffected by your fire.
How Far Should a Fire Pit Be From the Deck?
15 feet is the minimum distance that you should put between your wood burning fire pit and, basically, anything: walls, furniture, curtains, and also your deck. The same applies for anything above it, such as overhanging branches. Furthermore, the area surrounding your fire pit should be clear of leaves, twigs and similar sorts of debris in a 15 feet radius.
A gas or propane fire pit comes with the same restrictions, but many enthusiasts agree you can tone it down to 10 feet. This is because gas fire pits are a bit safer: controlling and putting the fire out is easier (by simply turning a knob back), no sparks or embers will be flying all over the place, and there is little to no smoke.
Can You Use a Fire Pit in a Gazebo?
Yes, you can—but not in just any gazebo. Here’s how to tell if yours is good for placing a fire pit within.
Flooring
We’ve already covered this, but a reminder doesn’t hurt: your fire pit should sit on pavers and a fireproof mat to prevent damage to the floor under it. Your gazebo should preferably be sitting on concrete or stone before you think of bringing your fire pit in.
Furniture
Anything wood or upholstered runs the risk of getting hit by a stray ember. If you must have chairs and a table inside, go for non-flammable materials such as metal and glass.
Material
It should be as fire retardant as possible. This rules out canvas and wood. A gazebo whose structure is made of metal is a good start.
Size
Your gazebo should be roomy enough to allow a minimum distance of 3 feet between each of its sides and the fire pit. Roof should be no less than 6 feet above it; 10 is better.
Ventilation
You need plenty of it. A gazebo that is only 4 pillars and a roof is the best; screened gazebos are a no-no. The roof should have a vent at the top; otherwise you risk accumulation of smoke and carbon monoxide.
Your Options
Finding a structure that meets all the requirements is as easy as shopping for a grill gazebo; made specifically for placing a BBQ within, they come with shelves and hooks for your drinks and cooking implements. A fire pit will be right at home under one of these. Some models will even increase your shaded area by way of a collapsible awning.
What Else Can I Do To Better Enjoy My Fire Pit?
We’ve spoken of fire mats, of surfaces, locations and vigilance. Here are a few more recommendations.
1. Check the Weather
A gentle breeze is fine; if you expect strong gust, it is best to postpone your merry gathering until conditions improve. Rain is another thing you should avoid: although it won’t be a safety hazard, exposure to water might cause your fire pit to start rusting.
2. Check for Burn Bans
These are temporary restrictions placed by relevant authorities, for reasons that may vary: in summer, to reduce the risk of an errant ember landing on dry grass and starting and conflagration; and in winter, to address high smoke concentrations due to more people burning wood for heat. Failing to uphold one of these bans will often carry hefty fines. Always check before using your fire pit, or your grill for that matter.
Worth noting: propane fire pits are more likely to be burn ban friendly (especially if they are CSA certified), as they put out very little smoke. That said: it doesn’t hurt to ask the relevant office about it.
3. Mind What You Burn
We’ve already covered how gas fire pits do not allow wood; this doesn’t mean you can toss anything you want into a fire pit that does run on wood. First, avoid placing general waste such as plastic, magazines or cardboard. Second, don’t burn the following types of wood:
- Plywood
- Fiberboard
- Painted or pressure-treated wood
- Driftwood
- Pieces with mold or vines on them.
Your source of fuel should be firewood, preferably kiln-dried; if you can’t procure it, then it should be seasoned (left in the open to dry, covered to preserve from rain) for a minimum or six months. Species that are optimal for use as firewood include hardwoods such as oak, maple, birch and ash. Softwoods like pine, on the other hand, are better used as kindling. More on that below.
4. Build Your Fire Appropriately
Paying attention to this will help you achieve a cleaner, more efficient burn; this means staying warm with less fuel, and a noticeable reduction in smoke.
Tinder, Kindling, Wood
These are the three kinds of fuel a campfire—or, in this case, a fire pit—will need in order to thrive, and they must be set up in a specific order.
- Tinder. What you apply your lighter to; must be something that ignites easily and burns quickly. Examples: newspaper, cotton (in balls or lint), very small twigs, crushed dry leaves or grass.
- Kindling. Burns longer than tinder does. It holds the fire for a while, giving time for your logs to heat up and catch the flame. Pine, fir and other softwoods work well as kindling; just remember to keep your sticks about pencil size. Procure more fibrous bits of kindling as well, by running a knife down a log of softwood and collecting the fibers that result.
- Wood. We covered this more in depth a few paragraphs back, but in summary: stick to hardwoods such as oak, ash and maple, and be sure your stockpile has been kiln-dried or seasoning before using.
We have our three elements. Time to learn how to set them up.
The Fire Lay
Aside from making sure the flame travels from one fuel to the next in the right order, one must provide sufficient ventilation to the fire as it starts. A fire lay helps with both goals by giving you a specific way to set up your three elements. There are several different fire lays (lean-to, pyramid, star), but one that is often recommended for fire pits is the cabin log. Here’s how it’s done:
- Begin by making a tinder bundle. Roll small, fibrous bits of your kindling back and forth in your hands, shape the larger pieces into a ball, and then create a dip in the center to turn it into a nest. It is in here that your tinder sits. Place your tinder bundle at the center of the fire pit.
- Place larger sticks of kindling around the tinder bundle, leaning against one another, until you surround the bundle. Be sure to leave gaps for ventilation, as well as for you to reach your tinder bundle without disturbing the sticks around it. At this point, you’ve built a teepee, widely considered the first fire lay any novice should learn. We, however, are not stopping here.
- Select the biggest logs of the wood pile you have reserved for your fire, and set them aside. Place the two largest ones on both sides of the teepee, parallel to each other.
- Pick two more logs, only a bit smaller than the two you started with, and place them on top, parallel to each other and perpendicular to those sitting below.
- They should sit a little closer to the teepee, as well.
- Continue in this manner, selecting logs of progressively smaller size and placing them just a bit closer to the teepee, sort of hugging it. By now you may have have guessed why this fire lay is known as the ‘cabin log’.
- When your structure’s height is just past the teepee, create a loose roof above it with small chunks of firewood. Mind the gaps at the top for ventilation. Your fire lay is now ready for your lighter!
5. Use Protection
As your fire goes on, there will usually be small burning bits flying to and fro, and which you don’t want landing anywhere critical (furniture, walls, vegetation). Keeping your distance and using a fire pit mat will be of great help, but a spark screen provides the ultimate level of safety in this regard by letting your fire breathe freely while keeping all sparks and embers contained. Spark screens are available in different shapes and sizes; many come with a tool for lifting the screen while keeping your hands away, and some even feature a sliding half so you can poke your logs without having to remove the whole thing.
Fire pits at ground level will benefit from a fire ring, especially if it is a permanent fixture; one of these will help preserve the fire pit’s walls from the worst of the heat, so it will last longer. Fire rings feature a variety of wall patterns and shapes.
6. Be Prepared
An extinguisher is your best bet in case something goes wrong, but it is not the only one; a bucket of water or sand are good alternatives. If you use water, remember to pour it on the fire with not too much force (if you use a hose, use it on shower mode rather than jet), so no embers will be sent flying by the force of the stream.
You can also keep a fire blanket handy, for you to spread over the fire if it threatens to get out of control. Though it is single use, it doesn’t require any training, and you can also wrap it around your body.
Last but not least: a properly equipped first aid kit. Just in case.
7. Keep Your Fire Pit Covered
Many off-the-shelf fire pits are made of metal, which doesn’t go well with water. Rain is not the only concern: if any debris lands on the surface and it sits there long enough, it may collect moisture from the air, which may lead to rusting. If at all possible, reserve a dry, sheltered space to store your fire pit when you don’t plan to use it. At minimum, a weatherproof cover of the appropriate size and shape is highly recommended.
Does a Fire Pit Need Air Holes?
If your unit is off the shelf, then you don’t need to worry about this. If, on the other hand, you’re building your own, then this definitely concerns you. A strong, efficient fire will benefit from appropriate ventilation, therefore: yes, your fire pit needs holes. Some advice:
- Mind their placement. Most enthusiasts agree in recommending a 2 inch vent every 24 to 36 inches around the base. If your fire pit is particularly wide or tall, you can always place a few more holes; the idea, after all, is to help your fire breathe.
- Keep them clean. Those holes won’t do you any good if they get clogged. Ash, leaves, unburnt bits, every obstruction must go as soon as you spot it.
- Choose your materials carefully. Plastic may be great for waterproofing, but it is notoriously bad at enduring heat. If you use it on your holes, it will be so close to the fire it will melt, and you and yours will be left breathing in those highly toxic fumes.
Can You Cook Marshmallows Over a Gas Fire Pit?
If you can roast them on a campfire, then a wood fire pit will work just as well. But what of those that burn gas?
The answer is yes: you can cook marshmallows over a gas fire pit. When it burns, propane (or natural gas, for that matter) does not release any substances that could make your marshmallows (or s’mores) less appetizing. Go for it!
Can You Cook Hot Dogs Over a Gas Fire Pit?
The answer to this one is also yes. Place your frank or cocktail wiener on a stick, roast it over the fire until the surface is brown and bubbly, and place it in a bun or eat it as is—once it’s cooled down, of course!
Can You Use Your Fire Pit Like a Grill?
If it burns wood? Yes, you can, but only if it comes with the necessary grate; fortunately, it is not hard to come across fire pits with this implement. Some will come with a swiveling grate, whereas others will be large enough to feature a full section for cooking.
If your fire pit burns gas, however, that’s a different story. It’s not about the gas affecting the food—it’s the other way around. Most of the food we cook (and many favorites for outdoor cooking) release juices, grease, and other droppings, which would be a pain to remove from your lava rocks or fire glass… and would be particularly problematic if they get on the burner itself.
Marshmallows and hot dogs are okay: the former releases no juice and the latter will likely be out of the flame before anything serious drips into the fire pit. Steaks, bacon, veggies, on the other hand… you probably get the gist.
Know Your Backyard Fire Pit Facts
And there you have it: we’ve covered just about any question about fire pits that could be rolling about in your head. All that’s left is, getting yours, setting it up, and starting your fire!